Broadband routers are in wide use today. They enable multiple computers to share a single internet connection, and also provide enhanced security by not allowing arbitrary incoming TCP connections from the internet to reach computers on the LAN (Local Area Network) side of the router.
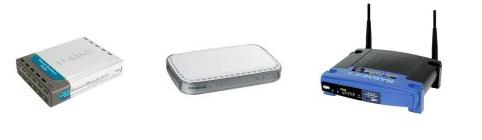
A broadband router can be a stand alone device with one end plugged into your Cable/DSL modem and the other end plugged into your computer or a wireless antenna, or sometimes they are built directly into DSL and Cable modems.
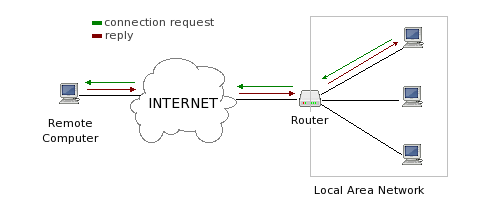
Broadband routers keep track of all outgoing connections from the LAN side by maintaining an internal mapping table of which computer on the LAN is responsible for a given outgoing connection to a particular destination on the internet. This allows two-way communication between computers on your LAN and computers on the internet, so long as it was a computer on your LAN that initiated the connection in the first place.
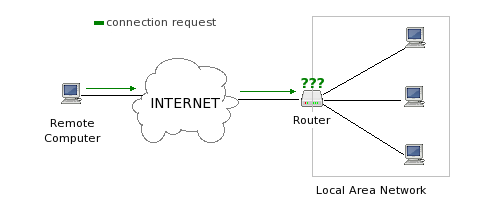
When an unsolicited connection comes in from the internet (perhaps from another peer in a download swarm), your router does not know what computer, if any, in the LAN should receive the connection, and will block it.
In order to receive incoming connections from the internet to your computer on the LAN side of the router, you need to change a setting in the router's configuration so that it forwards all incoming connections for a particular port number to your computer in your LAN. There are a few different ways to do this.
Before you forward a port, you need to know what port numbers Tixati is configured to use. Refer to
step 2 and step 3 in the Optimizing Tixati Guide for more information.
The Simplest Way to Forward a Port: Universal Plug and Play (UPNP)
Universal Plug and Play is supported by many broadband routers. It automates the process of mapping an incoming TCP or UDP port from the internet to a particular computer on the LAN side of your router.
To see if this will work for you, the UPNP option within Tixati needs to be enabled.
Click the 'Settings' button at the top of the main window. The Settings window will appear. Click "Network > Incoming Ports" in the list along the left side. You should see something like this:
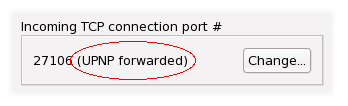
You will see that your incoming TCP and incoming UDP settings are in view. If UPNP is already activated, it will be indicated as shown here:
If this is the case, UPNP is already active, and if you are receiving incoming connections and DHT messages
(see step 2 and 3 in the Optimizing Tixati Guide), then you can skip the rest of the steps on this page. If UPNP was already active and you are not receiving incoming connections or DHT messages, your router probably does not support UPNP and you will have to proceed to the next section below.
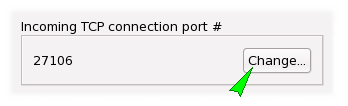
If UPNP is not active, it is simple to activate it. Click the change button:
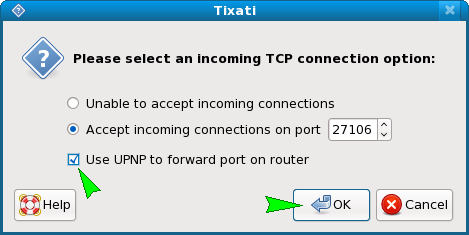
A pop-up window will appear, from which you can activate UPNP:
Repeat this to activate UPNP for the UDP port as well.
Now that you've activated UPNP, repeat
steps 2 and 3 in the Optimizing Tixati Guide to see if UPNP is working for you. Not all broadband routers support UPNP, and some support it but are very unreliable when forwarding incoming connections this way.
If after activating UPNP and running some transfers and the DHT for a few minutes you still are not receiving incoming connections and DHT packets, you can resort to manually configuring your router to forward incoming connections to your computer on the LAN side of the router. That is covered in the next section.
Manually Configuring Your Router to Forward a Port
If UPNP is not working for you, this is the alternative. This procedure may be difficult for users that are new to computing and the internet. It is important to remember that receiving incoming connections is not necessary for good performance from Tixati, and if you are not confident when it comes to configuring your router, you may not want to do this.
First, you should make sure your computer has a static private IP address in your LAN. The procedure for doing this on different operating systems is beyond the scope of this guide, but we have provided the following links which outline the procedure:
PortForward.com - Configuring a Static IP Address in Windows 7
PortForward.com - Configuring a Static IP Address in Windows Vista
PortForward.com - Configuring a Static IP Address in Windows XP
When following the above procedures, make a note of the static IP that you've chosen.
The next step is forwarding the port in your router's configuration. This is usually done by directing your web-browser to your router's IP address, which is usually 192.168.1.1 or 192.168.0.1 . You will be prompted for a user name and password, which by default is usually "admin" for either the user name or password, or sometimes both. Once you've logged in, you will be presented with a web-based configuration interface that allows you to make the needed changes.
Because there are many different brands of broadband router and the procedures for accessing and configuring them vary greatly, we can't outline the specific procedures for each one. Here are some links which should help you:
Netgear Port Forwarding Instructions
PortForward.com - List of Routers by Brand (this link contains instructions for dozens of different routers)
Once you've finished configuring port forwarding in your router, you should repeat
steps 2 and 3 in the Optimizing Tixati Guide to see if you can now receive incoming connections and DHT messages.